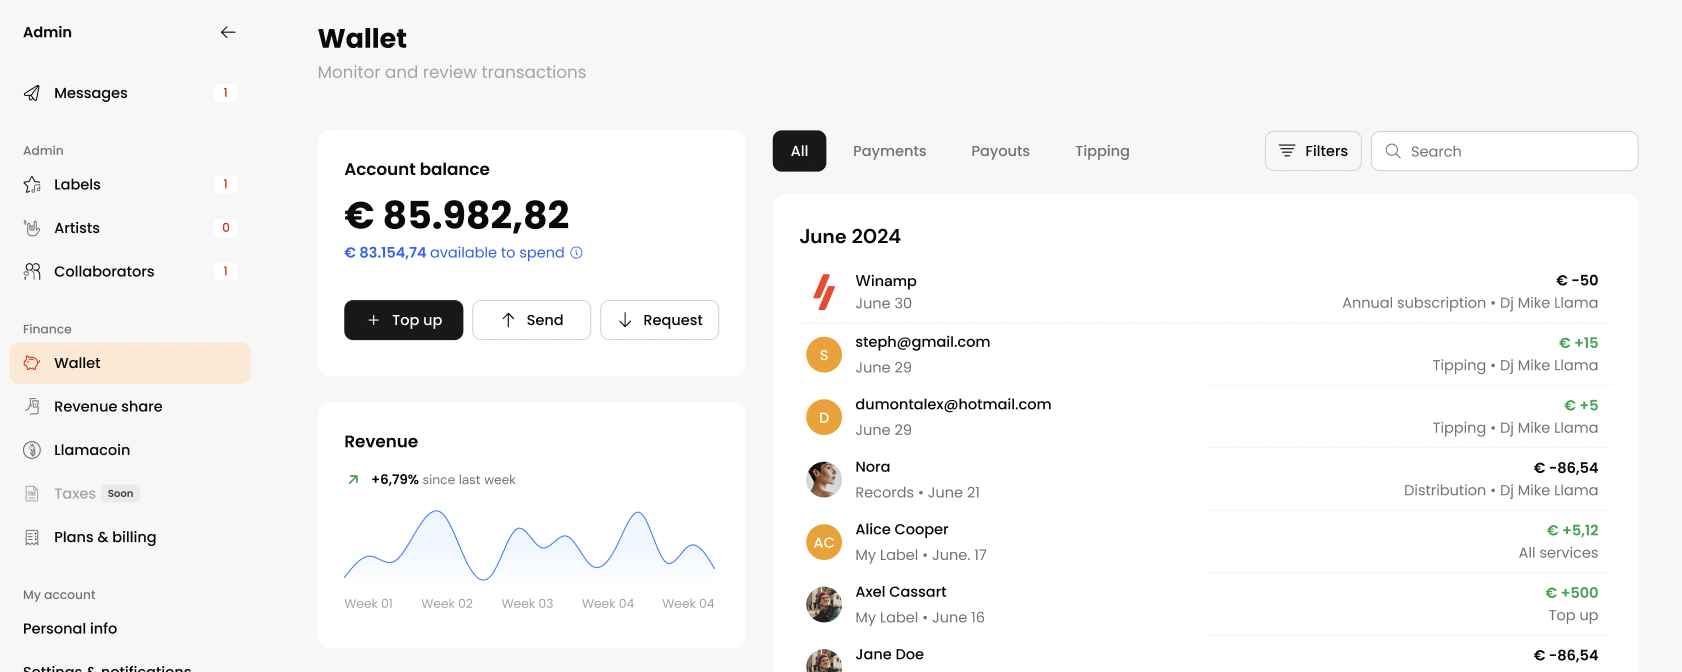
Wallet
The Wallet tab of the Admin Dashboard is where you can see your current account balance, request your earnings or top up your account, as well as see all your transactions.
Revenue Sharing
In the Revenue Share tab of the Admin dashboard, you can set revenue sharing rules so that you can share the account earnings with your collaborators.
To add a new rule, navigate to the Admin dashboard and select the Revenue Share tab.
Next, click on Add a new rule. You will be redirected to the Revenue beneficiary screen where you will specify the revenue sharing rules with a collaborator.
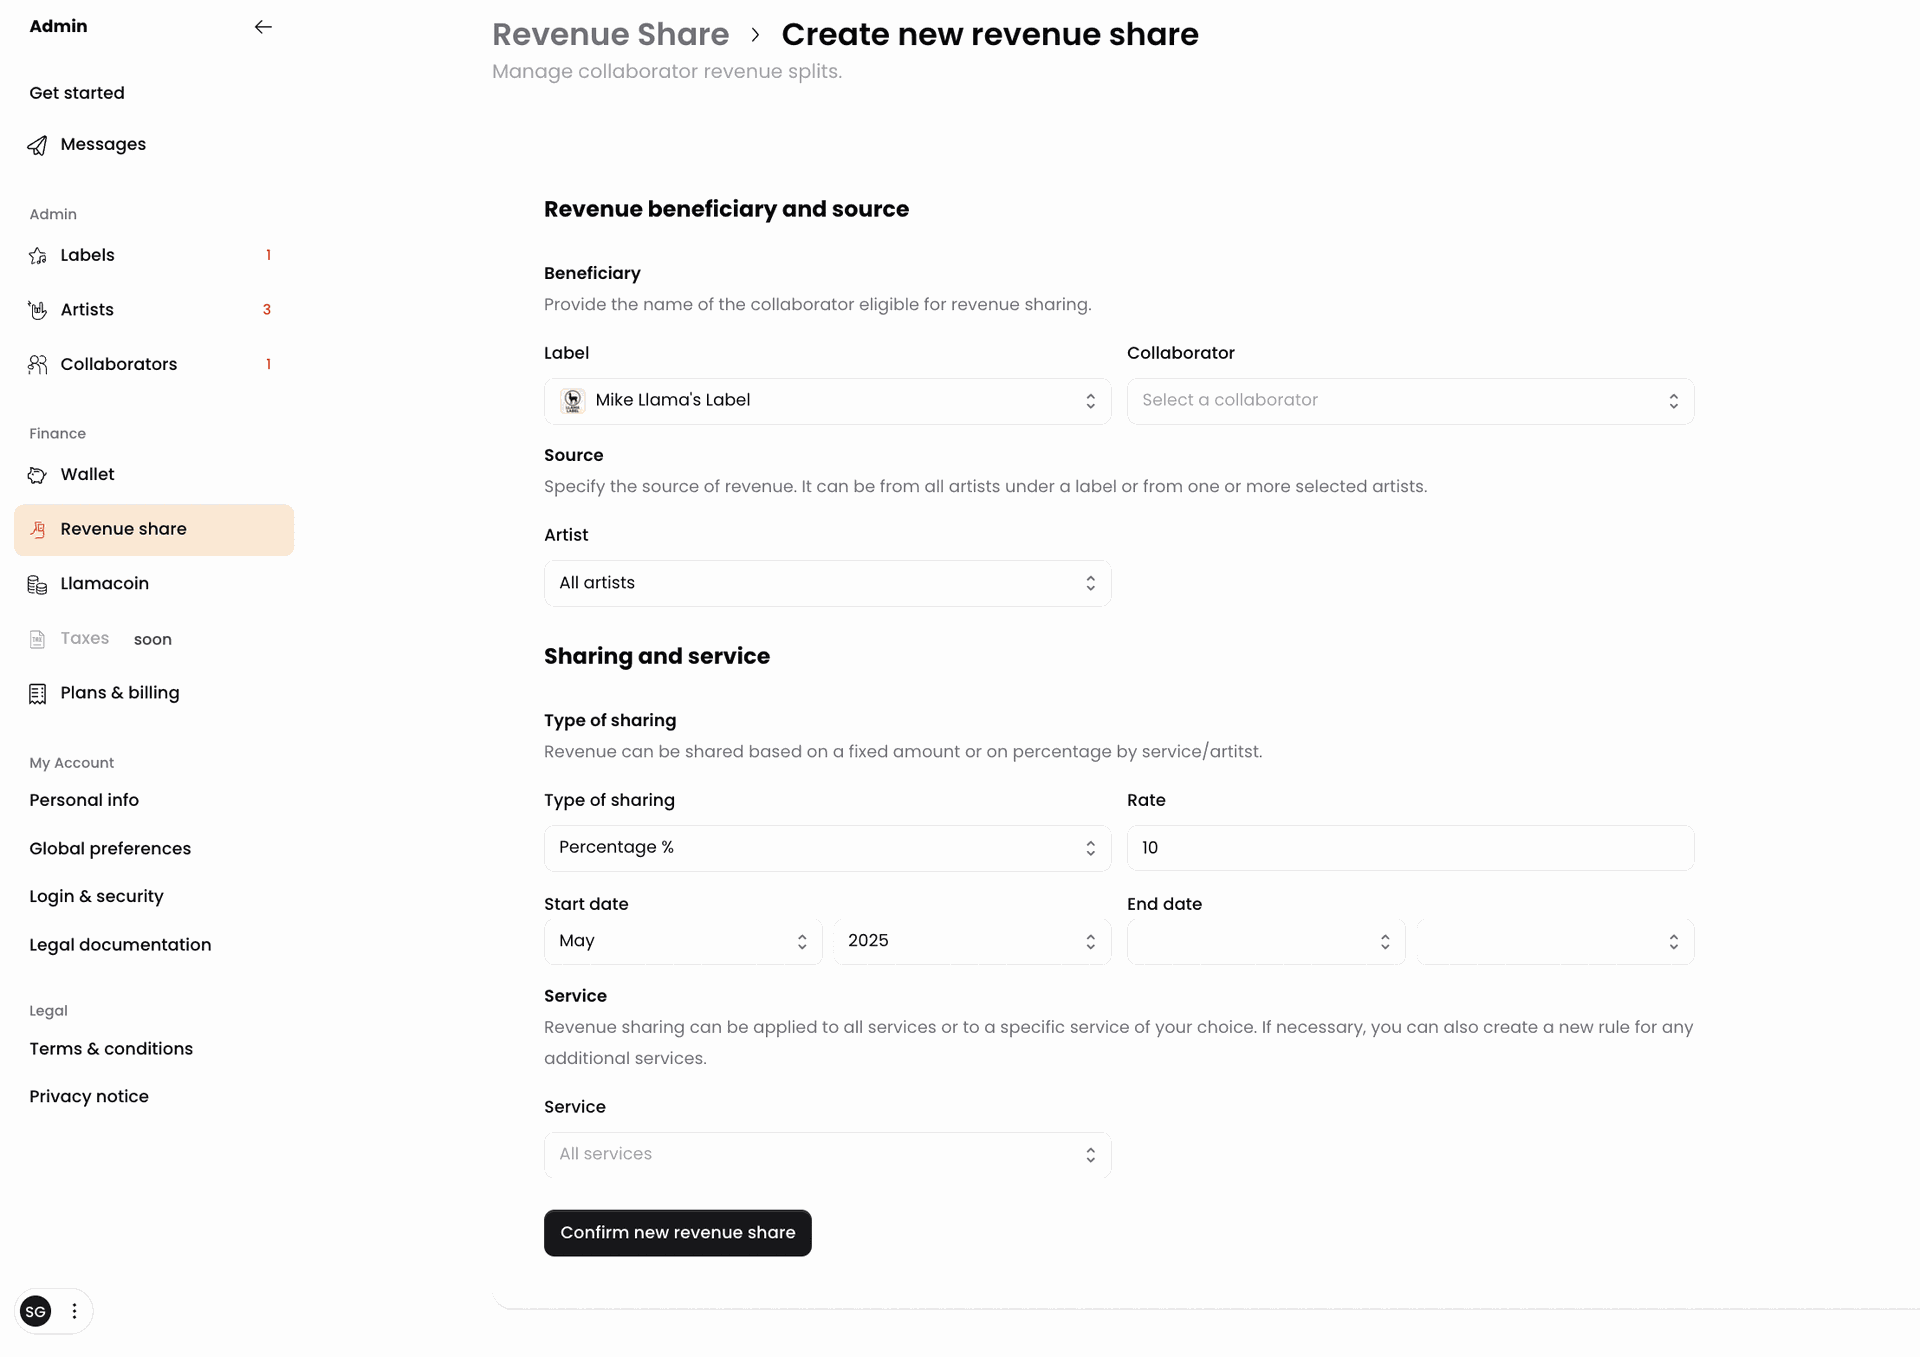
Start by setting the Beneficiary or in other words, the collaborator that should be receiving a revenue share percentage of your earnings.
Next, select the collaborator with whom you will be sharing revenue from the Collaborators dropdown menu.You can filter your collaborators by Label to which your collaborators have been added. If you don't have a label, then skip this step.
Proceed to selecting the source of revenue. As the revenue is accrued per artist, you can specify the artist whose earnings will be shared with the collaborator from the Artist dropdown menu. You can select one or more artists.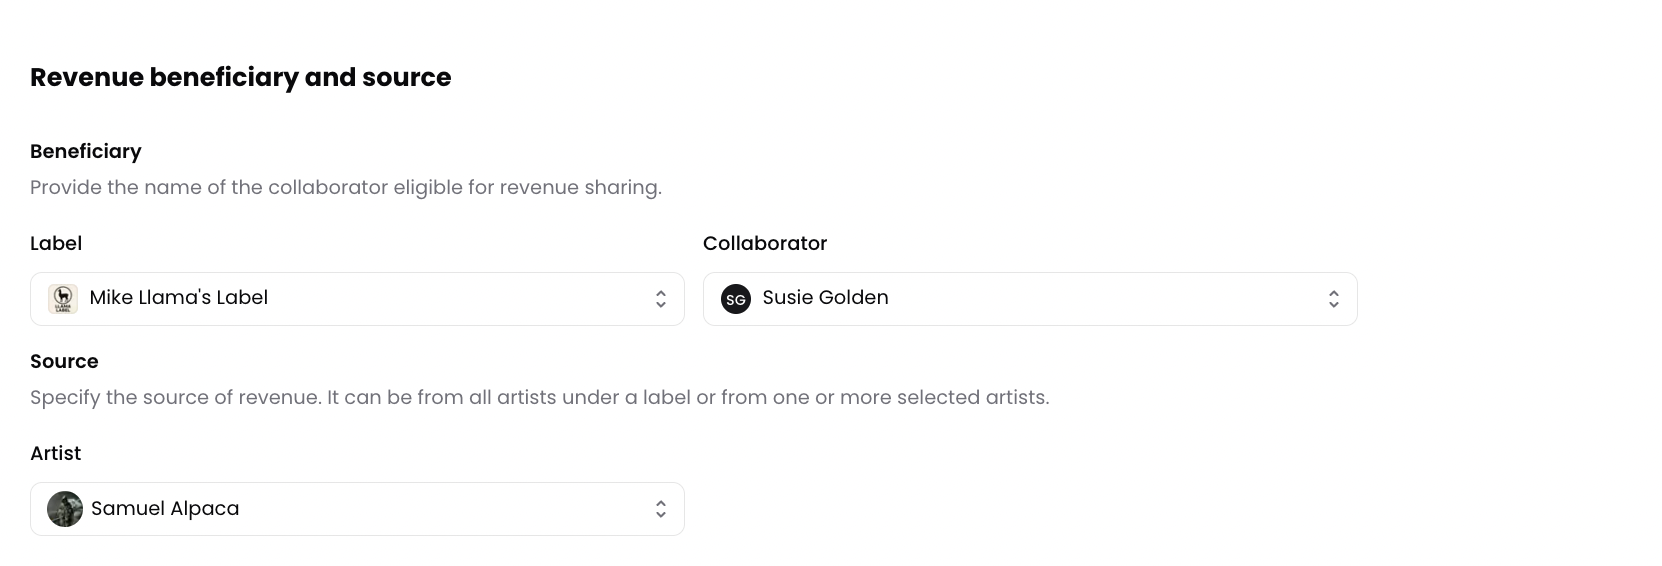
Then, select the way you will be sharing revenue with your collaborators. You can either share a percentage or a fixed amount.
- To share a percentage of the revenue, choose Percentage % of the Type of sharing dropdown menu and add the % you wish to share in the Rate field.
Next, select the Start date and End date during which you will be sharing revenue with your collaborator.
Select the specific service line from which you will be sharing revenue with a collaborator from the Service dropdown menu.

- To share a fixed rate, choose Fixed amount andspecifythe amount you wish to pay your collaboratorsinthe Amount field, along with the Currency.
Then, specify the frequency of how often you will be paying you Collaborators by selecting the payment interval in the Frequency dropdown field.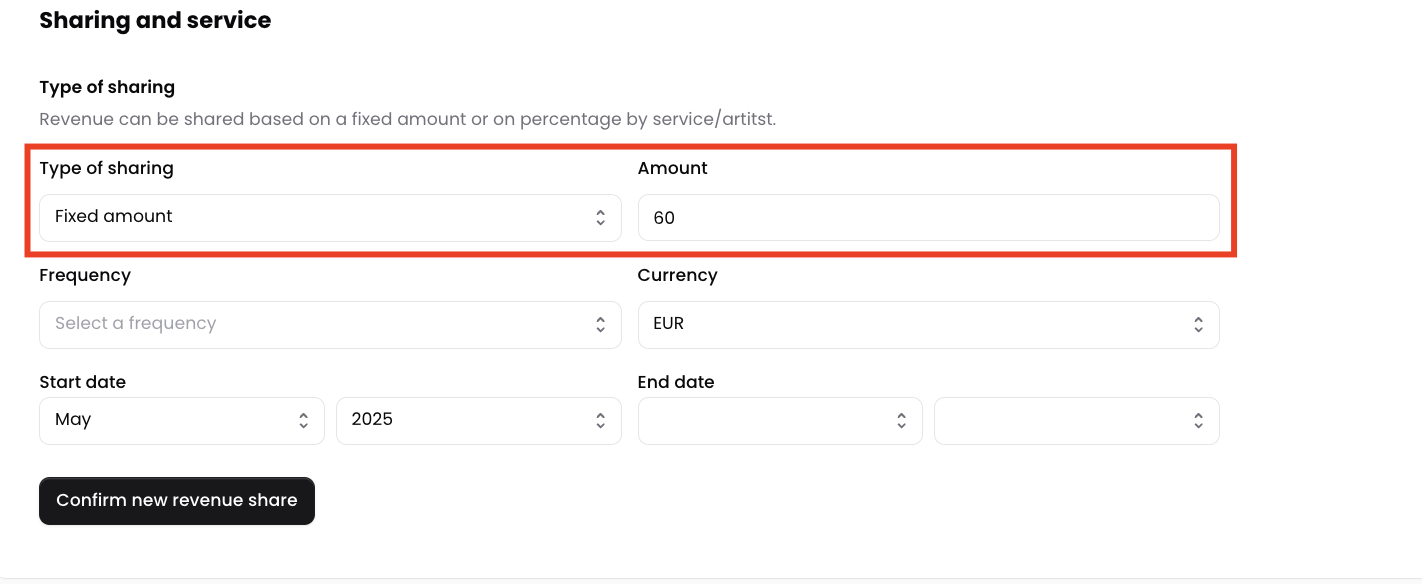
Once you're done, click Confirm new revenue share.
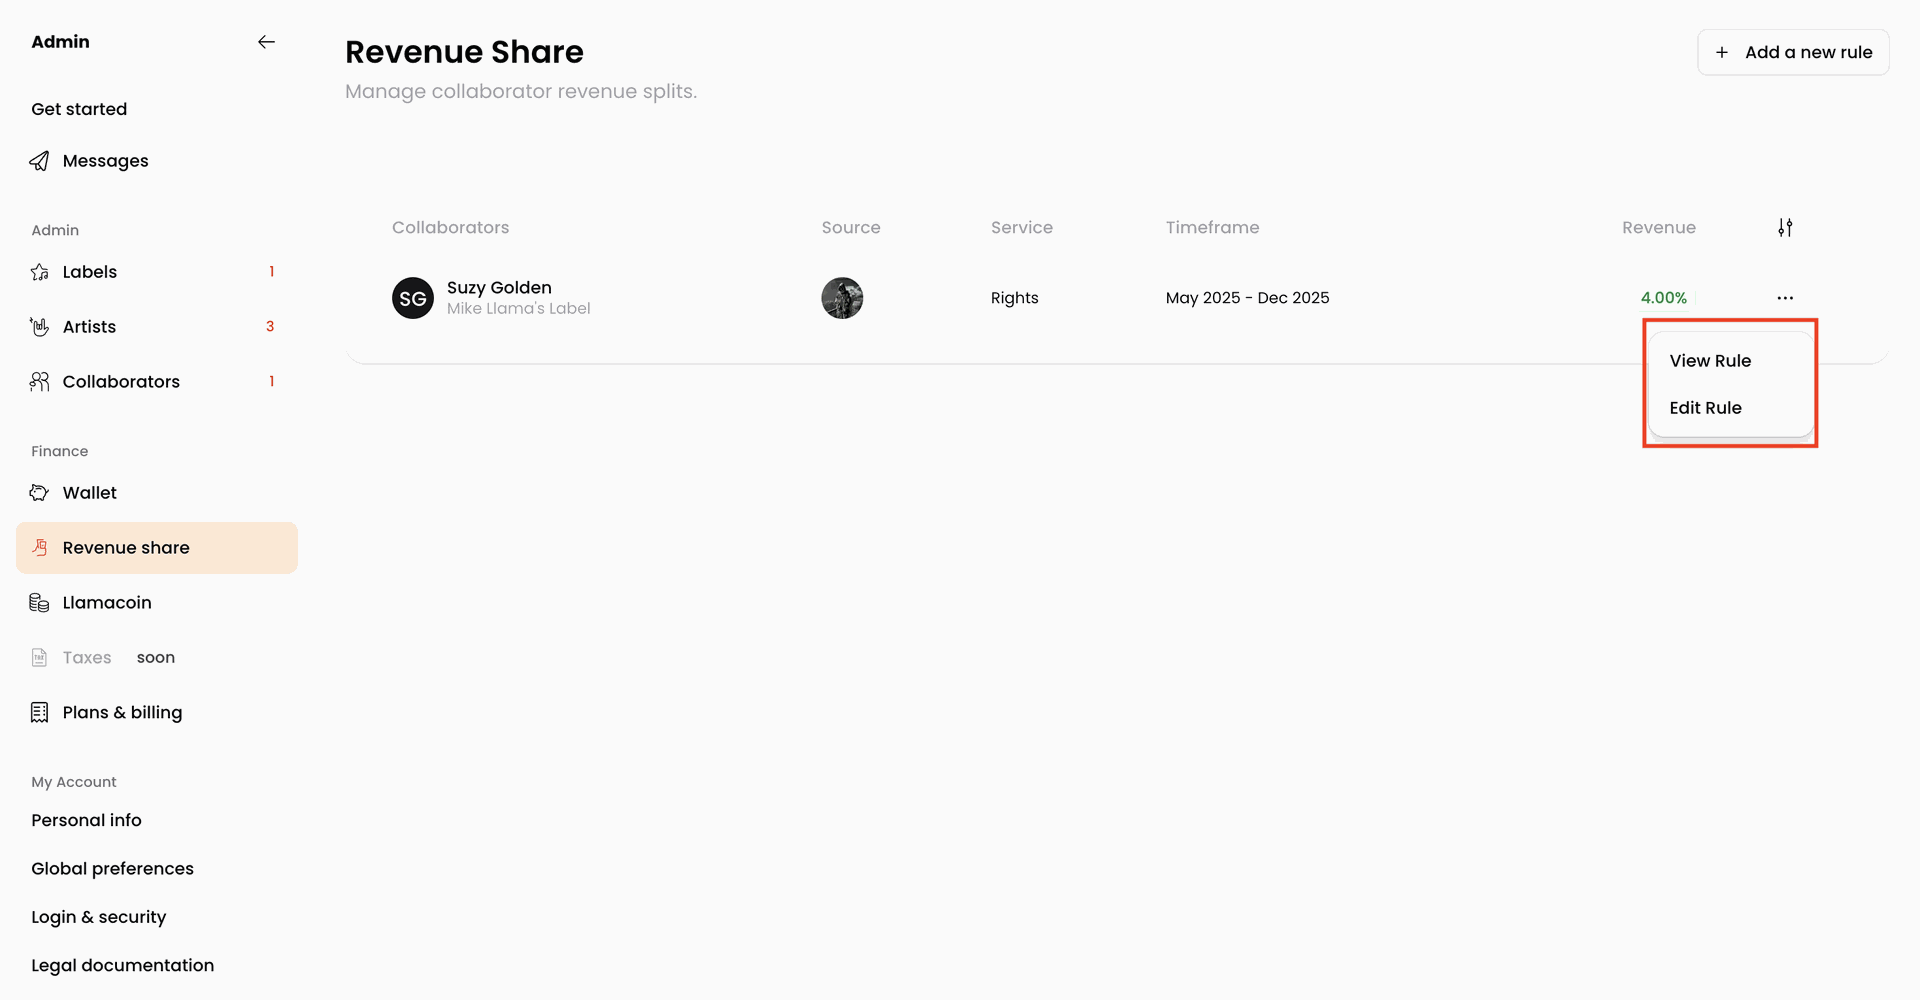
Your newly created rule will be visible in the Revenue Share tab of the Admin dashboard. You can view or edit your rules by selecting the desired option from the More menu next to the rule.
Plans & Billing
In the Plans & Billing tab of the Admin dashboard, you can see the active Winamp for Creators subscription plan for each artist.
If you have not selected a Premium subscription plan for one of the artists, they will automatically be added to the Free plan.
Upgrade to a Premium Subscription Plan
If you have not selected a Premium subscription plan for one of the artists, they will automatically be added to the Free plan.
To upgrade your artist profile to a premium subscription plan or upgrade the profile of one of the artists that are part of your label, navigate to the Plans & Billing tab of the Admin dashboard.
Next click the Subscribe button under the artist for whom you'd like to purchase a premium subscription.
You will be taken to our pricing page where you can select your preferred subscription plan by clicking the Get started button located under the plan of your choice.
Next, you will be redirected to our check out page, where you will need to enter your card details, including your card number, cardholder name, expiration date and CVC number.
Once you've paid, you will be redirected back to Winamp for Creators.
Manage your Premium Subscription
If you need to manage your Subscription with Winamp for Creators, please contact us through our contact form.